If you’re in the Email Marketing world, you’ve definitively heard about Domain Authentication, DKIM, SPF, DMARC and related concepts that everyone talks about in order to improve email deliverability = landing emails in the Inbox folder.
And there are also the more recent Yahoo&Gmail changes related to domain authentication for email senders.
Also make sure you read about testing emails for deliverability problems before sending (case study included).
So, what is Domain Authentication for Email Marketing?
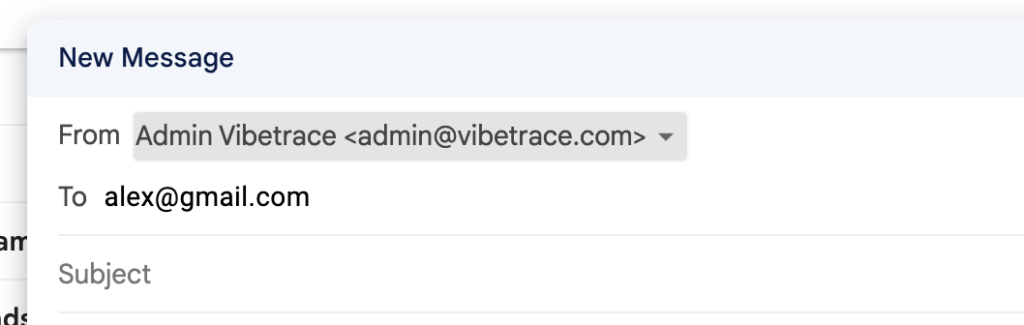
Domain Authentication for Email Marketing refers to the process of verifying that an email sender is authorized to send emails on behalf of the domain listed in the “From” address.
It’s like a signature you give to tell everyone that you’ve allowed X to send emails on your behalf. (in order to use your domain in the from address)
Introduction
Email deliverability is not easy. And this is specially because good email providers need to constantly work against spammers. Which also puts more pressure and give more work to good senders.
This makes it a constant battle, similar to viruses and antivirus programs.
Email deliverability is impacted by spam filters, low-quality email lists, and technical glitches. These roadblocks can mean your important messages end up lost in the spam folder, never reaching their intended audience.
Introduction to DKIM, SPF, and DMARC as solutions to these challenges.
But there’s hope! DKIM, SPF, and DMARC are a trio of authentication tools that can significantly improve your email deliverability. These work together to verify your identity as a legitimate sender, helping email providers sort your messages from potential spam.
It’s like telling email servers that receive email that it comes from a trusted source and should not be considered SPAM.
Understanding the Basics
Let’s delve deeper into the individual roles of DKIM, SPF, and DMARC. Those elements have the power to create a defense against email spoofing and phishing.
They are not helping you to send SPAM and land in Inbox. There are many criteria to create good emails.
We’ll go and explain each of these concepts, but first, here are some of the benefits of improving them.
- Improved email deliverability and sender reputation.
- Reduction in phishing and spoofing attacks.
- Enhanced trust with email receivers (ISPs and recipients).
- Insightful feedback from DMARC reports for ongoing optimization.
DKIM (DomainKeys Identified Mail):
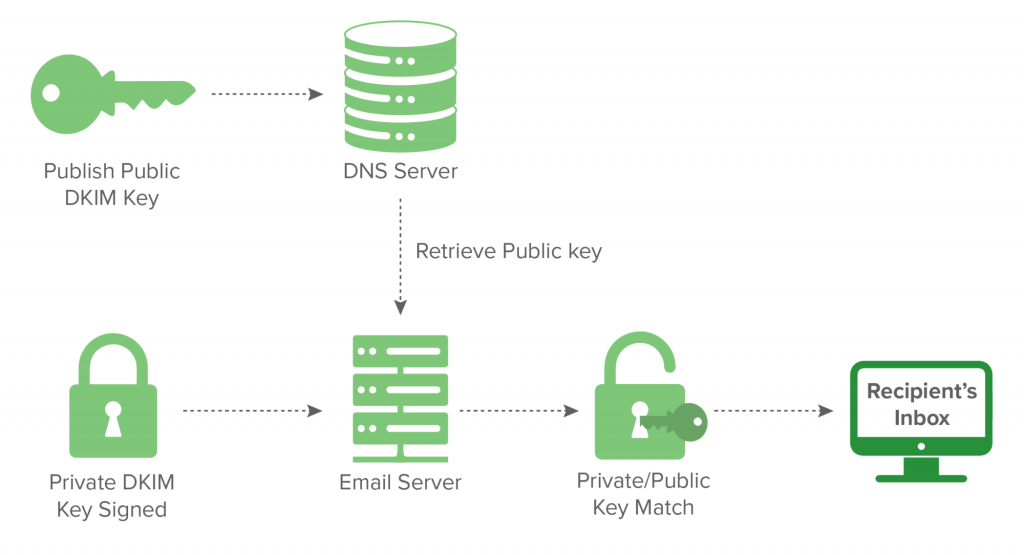
- Function: DKIM acts like a digital signature for your emails. It adds a cryptographic seal to the message header, containing information about your domain name and a public key.
- Role in Authentication: Email servers receiving your message can use the DKIM signature to verify its authenticity. They use a public key record published in your Domain Name System (DNS) to decrypt the signature and confirm it matches the private key used to sign the email. This ensures the message originated from your domain and hasn’t been tampered with in transit.
SPF (Sender Policy Framework):
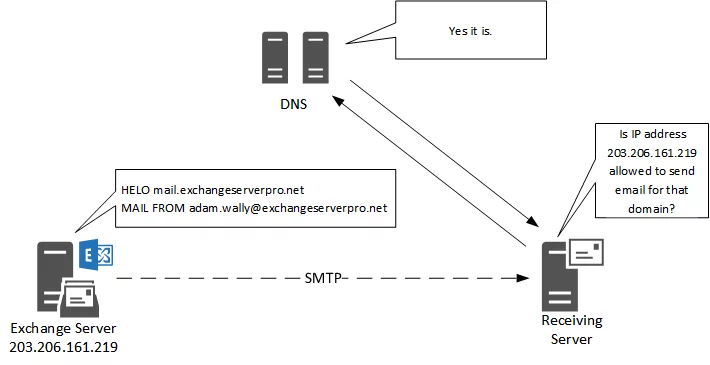
- Function: SPF acts like a security guard, checking the identity of anyone trying to send emails from your domain.
- Importance in Verification: You publish an SPF record in your DNS that specifies authorized email servers allowed to send emails on your behalf. These could be your own mail servers or third-party services you use for marketing emails.
- Preventing Spoofing: When an email arrives claiming to be from your domain, the receiving server checks the SPF record. If the email server sending the message isn’t listed as authorized, it’s flagged as suspicious, preventing email spoofing attempts.
DMARC (Domain-based Message Authentication, Reporting & Conformance):
- Function: DMARC acts as the manager, overseeing the entire email authentication process.
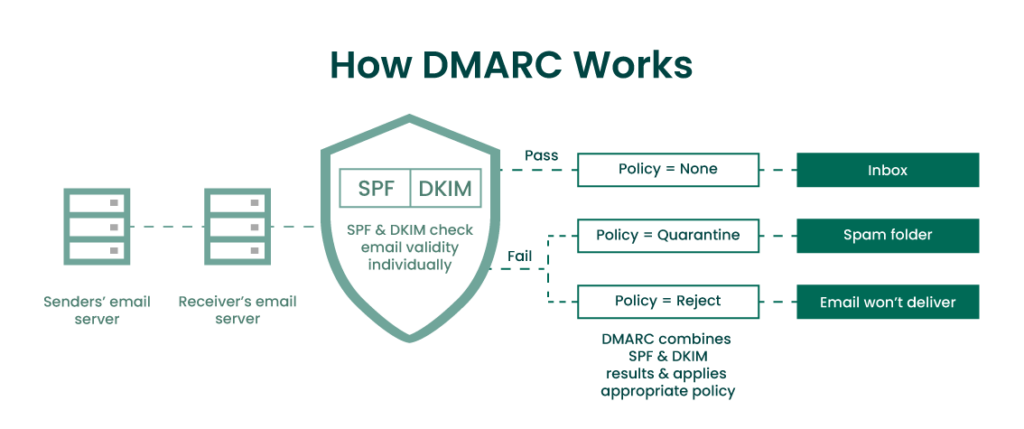
- Purpose in Authentication: DMARC leverages SPF and DKIM checks but adds an extra layer of control. It allows you to define a policy in your DNS record instructing email providers on how to handle emails that fail SPF or DKIM authentication (e.g., quarantine, reject, or deliver). DMARC also provides reports on email activity associated with your domain, helping you identify potential spoofing attempts.
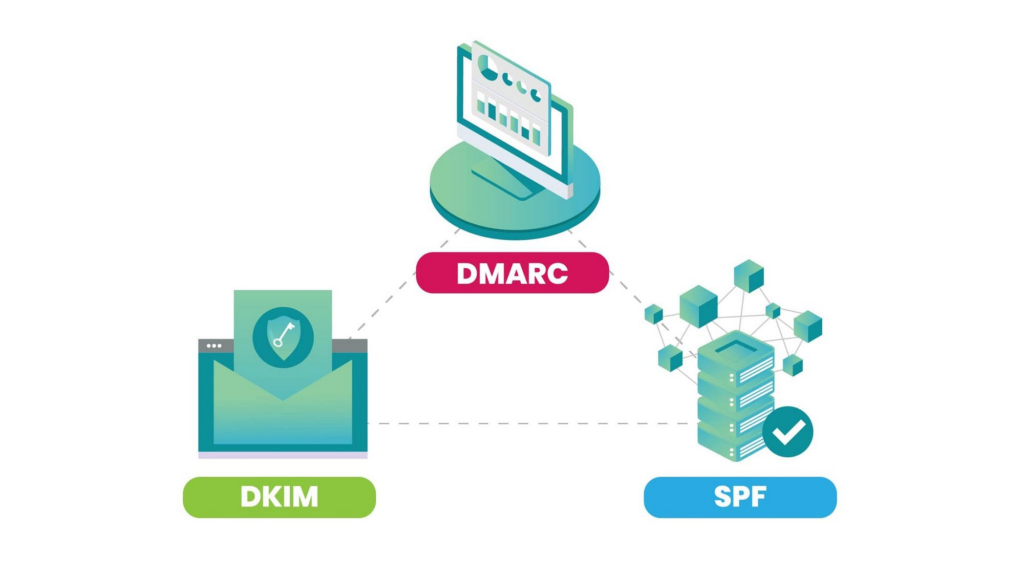
In essence, DKIM verifies the message itself, SPF verifies the sender’s IP address, and DMARC builds on these checks to provide a framework for handling unauthenticated emails.
Do you like this article?
Join our CX for Retail dedicated newsletter!

Stay connected to what’s really important to optimize your digital revenues.
By clicking the button, you accept our Terms & Conditions. Also you will need to confirm your email address.
How they work together
DKIM, SPF, and DMARC aren’t individual solutions, but rather a complementary team. Imagine a high-security apartment building.
- SPF (Sender Policy Framework) acts like the building’s security guard. It checks the ID (domain name) of anyone trying to enter (send an email) and only allows authorized senders (authorized email servers) access.
- DKIM (DomainKeys Identified Mail) functions like a digital signature for your emails. It adds a tamper-proof seal to your message, proving it originated from you and hasn’t been altered in transit.
- DMARC (Domain-based Message Authentication, Reporting & Conformance) is the building manager. It oversees the entire process, receiving reports from SPF and DKIM to identify any unauthorized access attempts (spoofed emails). DMARC then instructs email providers on what action to take with suspicious emails, ensuring they don’t reach inboxes.
Implementing all three protocols creates a powerful defense against email spoofing and phishing attempts.
It filters out illegitimate emails before they even reach your recipients, significantly improving both email security and deliverability.
Your genuine emails are more likely to land safely in users’ inboxes, fostering trust and better communication.
But remember, all these together are not a guarantee that your email will land in INBOX.
Implementation Steps
How to set up DKIM.
Setting up DomainKeys Identified Mail (DKIM) involves several steps, and it depends on the service provider you are using.
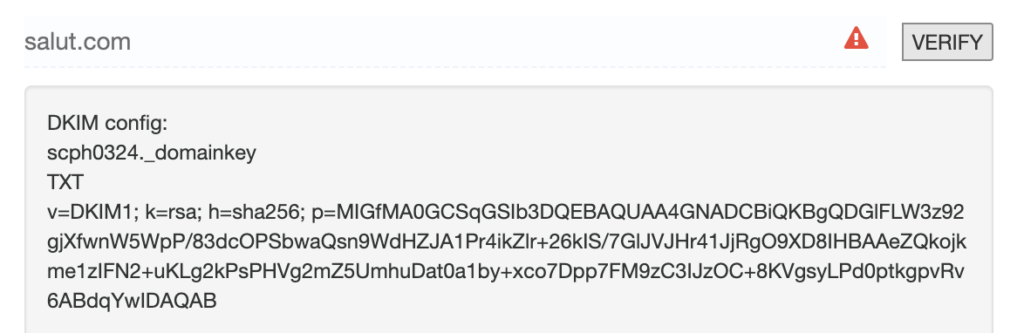
Vibetrace offers integration with multiple email providers, but also gives you the default option to set up and configure your DKIM configuration. If you’re using our default configuration, you’ll see an option similar to the following under your email settings.
Here’s a general guide on how to set up DKIM for your domain, which you can adapt or add to your blog article:
The general steps to set up DKIM involve:
- Generate a DKIM key pair: It involves creating a public and private key. You’ll typically use your email server software or a third-party service to generate the keys.
- Publish the public key: The public key goes into a TXT record in your domain’s DNS settings. This tells receiving email servers how to verify the DKIM signature in your emails.
- Configure your email server: You’ll need to configure your email server to sign outgoing emails with your private key.
How to configure SPF
SPF involves creating a TXT record in your domain’s DNS settings.
Here’s a general process:
- Gather IP Addresses: Identify all the email servers authorized to send emails on your domain’s behalf. This includes your own email server and any third-party services you use (e.g., marketing automation platforms).
- Build the SPF record: There are various online tools and resources to help you build the SPF record syntax. It typically starts with “v=spf1” followed by a list of authorized IP addresses and domains (using “include” statements for third-party services). You can end the record with “~all” to designate emails failing the SPF check as spam (or “-all” for hard fail).
Those values (IP addresses or domain names) need to be provided by your Email service Provider.
How to set up DMARC
Here’s a breakdown on how to set up DMARC for your blog article:
Setting Up DMARC
Here’s a the process for setting up DMARC:
- Choose a DMARC policy: DMARC policies dictate how to handle unauthenticated emails. You can start with a “monitor” (p=none) policy to receive reports without affecting email delivery. Then, progress to “quarantine” (p=quarantine) and eventually “reject” (p=reject) as you gain confidence.
- Create a DMARC record: This TXT record goes into your domain’s DNS settings. It specifies your chosen DMARC policy and reporting email addresses (“rua” for aggregated reports and optionally “ruf” for forensic reports).
- Monitor DMARC reports: DMARC reports from receiving servers will be sent to the designated email addresses. Analyze these reports to identify suspicious activity and adjust your DMARC policy accordingly.
DMARC Policies:
- p=none
- p=quarantine
- p=reject
What p=none means. This is the least strict policy and serves as a monitoring stage. No enforcement action is taken. Ideal for initial implementation
What p=quarantine means. For emails failing DMARC authentication, this policy instructs receiving servers to treat them as suspicious and potentially quarantine them. They might be placed in the SPAM folder.
What p=reject means. This is the strictest policy. Receiving servers are instructed to outright reject emails that fail DMARC authentication. These emails are not delivered at all.
Common Pitfalls and How to Avoid Them
- Misconfiguration issues and their impact.
- Tips for troubleshooting common errors in DKIM, SPF, and DMARC setups.